Getting Started
This is a step-by-step tutorial about understanding job scheduling and use the job scheduler to submit computing jobs on the Hoffman2 Cluster.
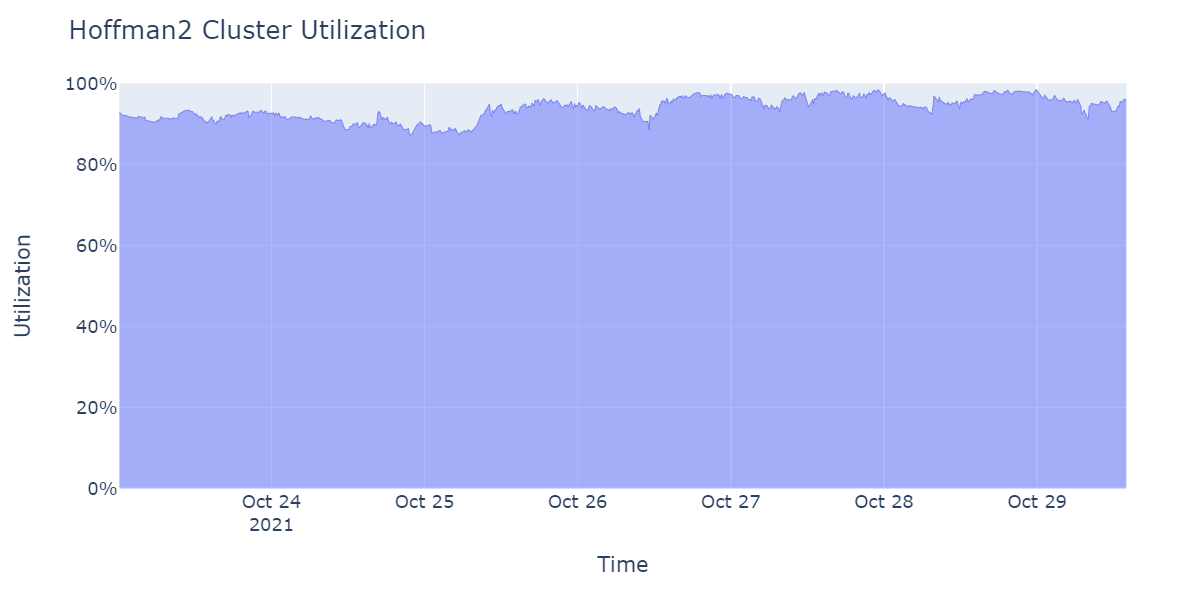
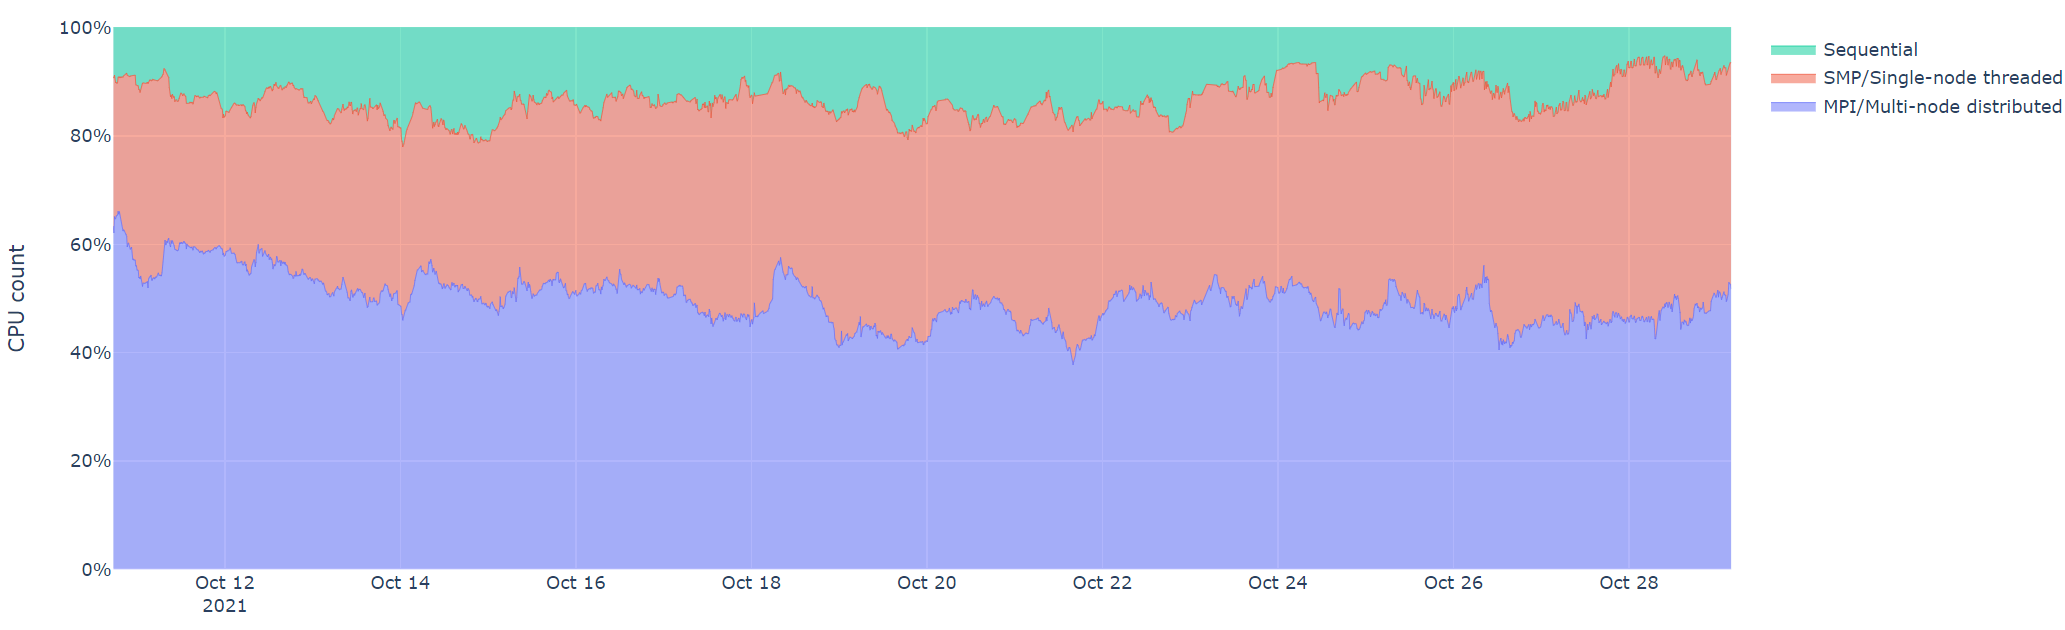
The users access Hoffman2 Cluster’s computing power via the job scheduler, Univa Grid Engine (or UGE), by submitting their computing jobs, either in batch mode or in interactive mode. The user should have a good idea about the available computing resources (CPU, memory size, and software packges) before submitting computing jobs. In practice, such understanding may help reducing unnecessary wait time, avoid common mistakes, or know where to look when things do not work.
Prerequisites
You should already have an account on the Hoffman2 Cluster. If not, see this page for getting an account.
Connection to Hoffman2 Cluster
The most standard way to connect to Hoffman2 Cluster is by running the secure shell (ssh) client from a text terminal, such as the (built-in) Terminal program on the Mac, or the (built-in) PowerShell terminal on Windows.
Text editing
You will need to edit your job script before submitting it to the job scheduler.
The easiest way is to edit the job script (text file) on Hoffman2 Cluster directly, using a text editor such as nano, vim or emacs.
Or, perhaps less preferrably, edit the files on your local computer and upload it to Hoffman2 Cluster.
If you are editing the files on Windows, be aware of the differences of the end-of-line characters between Windows and Linux.
The freeway analogy
Think of Hoffman2 Cluster like a freeway: many lanes (the compute nodes) filled with many cars (the user jobs).

source: https://en.wikipedia.org/
Observations from the free way analogy:
If everyone is going at full speed, the freeway can support an incredible amount of “flow rate”
Getting into the freeway might take some time (ramp, merge, etc.)
If someone blocks a lane, other cares are affected
If someone blocks a few lanes, more are affected
Unlike your own drive way, one needs to follow some rules when using the freeway
Login nodes vs. compute nodes
Key point: Use the compute nodes via the job scheduler as much as possible.
The login nodes have limited CPU/memory. They are not for running intensive computations/tasks (including compiling large software packages).
Examples of using login nodes are: editing source files, submitting jobs, and checking job status, etc.
Use the compute nodes for compute-intensive tasks
We will cover how to access the compute nodes via the job scheduler in details.
Recall The freeway analogy: your convenience may negatively affects others.
Free account vs. High priority access
Everyone affiliated with UCLA can get an account on Hoffman2 Cluster.
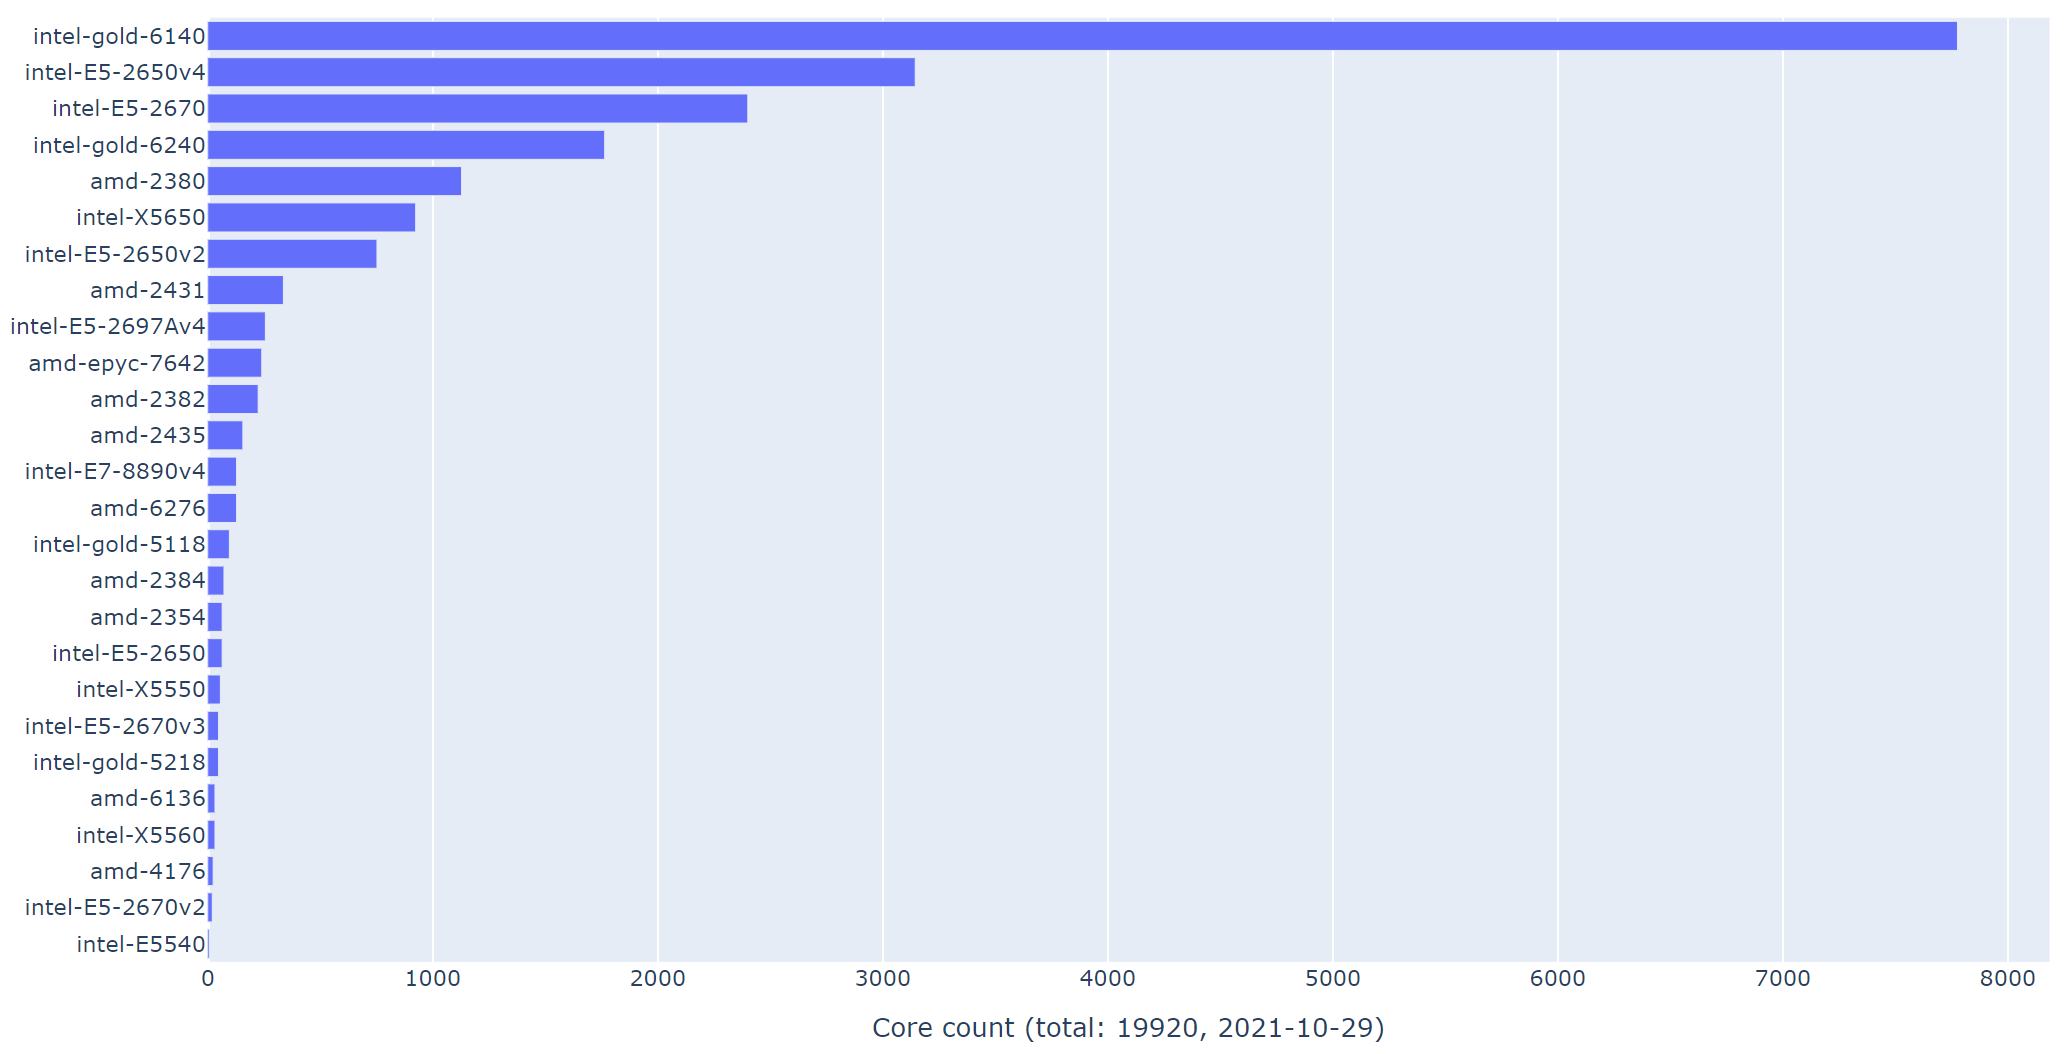
Research groups can purchase compute nodes for high priority access, or additional storage beyond the standard $HOME directory (see: File system).
For details about purchasing the pricing, please see: https://idre.ucla.edu/service-pricing-ordering-information
File system
You have access to several directories for differet purposes:
Directory |
Environment variable |
Purposes |
Life span |
|---|---|---|---|
home |
|
40GB, home directory |
same as your account |
scratch |
|
2TB, temporariy I/O |
at least 2 weeks (sometimes longer but not guaranteed) |
work |
|
100+GB, node-local temporary I/O |
runtime of a job |
Purchased storage (optional) |
See the symbolic link in your |
project space |
monthly/annual renewal |
In general, the $HOME directory is for storing your source code, scripts, documents and maybe some data files (be aware of the 40GB space limitation).
The $SCRATCH directory is good for running jobs, but you need to copy the useful output away before the files are automatically purged.
The $TMPDIR, local to a compute node, may be useful for certain programs that can take advantage of very fast disk I/O.
Examples of the directory names:
$HOME:/u/home/b/bruin$SCRATCH:/u/scratch/b/bruin$TMPDIR:/work/1234.1.pod_smp.q(different for different jobs, on different compute nodes)Purchased storage:
/u/project/PI_name/...
Note
It is advisable to use the environment variable names, such as $SCRATCH, in your job scripts
instead of “hard-wiring” the full paths.
The role of the job script
Key points:
The job scheduler does not run your computations automatically.
The job scheduler is about requesting computing resources (e.g. CPU, memory, runtime, etc)
Once the request is granted, a job is dispatched to the allocated CPU core(s)/memory/compute nodes to run. The user is responsible for specifying how the job is run, typically in a job script.
Typically a job script consists of two parts:
The requsted computing resources (e.g. how many CPU cores, how much memory, and for how long, etc.)
How the computation is run on the granted computing resources (CPU/memory)
All of these information can be written into one job script (shell script).
Some of the information may be provided via the command line, but we recommended writing everything into a job script (so it’s self-documenting).
Elements of Job Scheduling
memory size (
h_data)time limit (
h_rt)working directory
standard input and output
job number (ID)
task number (ID)
job script as a shell script (e.g. bash)
Single CPU or multiple CPUs
Single compute nodes vs. multiple compute nodes
Requested resources vs. Available resources, wait time
Other parameters/options
High priority (or not)
Exclusive (or not)
GPU computing
Understanding error messages and trouble shooting